在上一部分中,我们添加了创建新页面的功能,在本部分我们将为我们的应用添加一个 删除 功能。
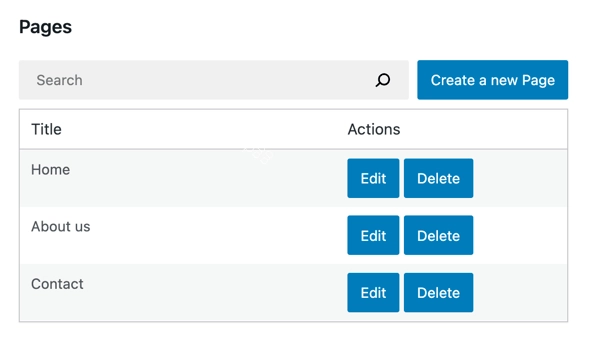
这是我们即将构建的内容预览:
步骤 1:添加删除按钮
让我们首先创建 DeletePageButton 组件并更新我们的 PagesList 组件的用户界面:
import { Button } from '@wordpress/components';
import { decodeEntities } from '@wordpress/html-entities';

const DeletePageButton = () => (
    <Button variant="primary">
        Delete
    </Button>
)

function PagesList( { hasResolved, pages } ) {
    if ( ! hasResolved ) {
        return <Spinner />;
    }
    if ( ! pages?.length ) {
        return <div>No results</div>;
    }

    return (
        <table className="wp-list-table widefat fixed striped table-view-list">
            <thead>
                <tr>
                    <td>Title</td>
                    <td style={{width: 190}}>Actions</td>
                </tr>
            </thead>
            <tbody>
                { pages?.map( ( page ) => (
                    <tr key={page.id}>
                        <td>{ decodeEntities( page.title.rendered ) }</td>
                        <td>
                            <div className="form-buttons">
                                <PageEditButton pageId={ page.id } />
                                {/* ↓ This is the only change in the PagesList component */}
                                <DeletePageButton pageId={ page.id }/>
                            </div>
                        </td>
                    </tr>
                ) ) }
            </tbody>
        </table>
    );
}
现在的 PagesList 应该看起来像这样:
步骤 2:将按钮连接到删除操作
在 Gutenberg 数据中,我们使用 deleteEntityRecord 操作从 WordPress REST API 删除实体记录。它会发送请求、处理结果并更新 Redux 状态中的缓存数据。
以下是如何在浏览器的开发工具中尝试删除实体记录:
// We need a valid page ID to call deleteEntityRecord, so let's get the first available one using getEntityRecords.
const pageId = wp.data.select( 'core' ).getEntityRecords( 'postType', 'page' )[0].id;

// Now let's delete that page:
const promise = wp.data.dispatch( 'core' ).deleteEntityRecord( 'postType', 'page', pageId );

// promise gets resolved or rejected when the API request succeeds or fails.
一旦 REST API 请求完成,您会注意到列表中有一个页面消失了。这是因为该列表由 useSelect() hook 和 select( coreDataStore ).getEntityRecords( 'postType', 'page' ) selector 填充。每当底层数据发生变化时,列表就会使用新数据进行重新渲染。这非常方便!
当点击 DeletePageButton 时,让我们分发该操作:
const DeletePageButton = ({ pageId }) => {
    const { deleteEntityRecord } = useDispatch( coreDataStore );
    const handleDelete = () => deleteEntityRecord( 'postType', 'page', pageId );
    return (
        <Button variant="primary" onClick={ handleDelete }>
            Delete
        </Button>
    );
}
步骤 3:添加视觉反馈
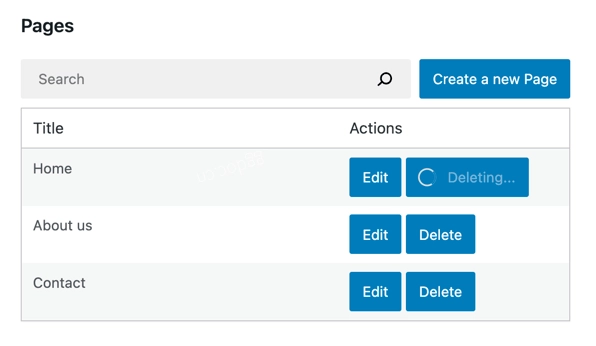
点击 删除 按钮后,REST API 请求可能需要几秒钟才能完成。让我们使用与教程前几部分中相同的 <Spinner /> 组件来传达这一信息。
我们需要 isDeletingEntityRecord selector。它与我们在第 3 部分中已经见过的 isSavingEntityRecord selector 类似:它返回 true 或 false,并且永远不会发出任何 HTTP 请求:
const DeletePageButton = ({ pageId }) => {
    // ...
    const { isDeleting } = useSelect(
        select => ({
            isDeleting: select( coreDataStore ).isDeletingEntityRecord( 'postType', 'page', pageId ),
        }),
        [ pageId ]
    )
    return (
        <Button variant="primary" onClick={ handleDelete } disabled={ isDeleting }>
            { isDeleting ? (
                <>
                    <Spinner />
                    Deleting...
                </>
            ) : 'Delete' }
        </Button>
    );
}
这是实际运行的效果:
步骤 4:处理错误
我们乐观地假设 删除 操作总会成功。不幸的是,在底层,这是一个 REST API 请求,可能会以多种方式失败:
- 网站可能已宕机。
- 删除请求可能无效。
- 在此期间页面可能被其他人删除了。
为了在这些错误发生时告知用户,我们需要使用 getLastEntityDeleteError selector 提取错误信息:
// Replace 9 with an actual page ID
wp.data.select( 'core' ).getLastEntityDeleteError( 'postType', 'page', 9 )
以下是如何在 DeletePageButton 中应用它:
import { useEffect } from 'react';
const DeletePageButton = ({ pageId }) => {
    // ...
    const { error, /* ... */ } = useSelect(
        select => ( {
            error: select( coreDataStore ).getLastEntityDeleteError( 'postType', 'page', pageId ),
            // ...
        } ),
        [pageId]
    );
    useEffect( () => {
        if ( error ) {
            // Display the error
        }
    }, [error] )

    // ...
}
error 对象来自 @wordpress/api-fetch,包含有关错误的信息。它具有以下属性:
message– 人类可读的错误消息,例如Invalid post ID。code– 基于字符串的错误代码,例如rest_post_invalid_id。要了解所有可能的错误代码,您需要参考/v2/pages端点的源代码。data(可选)– 错误详情,包含失败请求的 HTTP 响应代码的code属性。
有许多方法可以将该对象转换为错误消息,但在本教程中,我们将显示 error.message。
WordPress 有一个使用 Snackbar 组件显示状态信息的既定模式。以下是在部件编辑器中的外观:
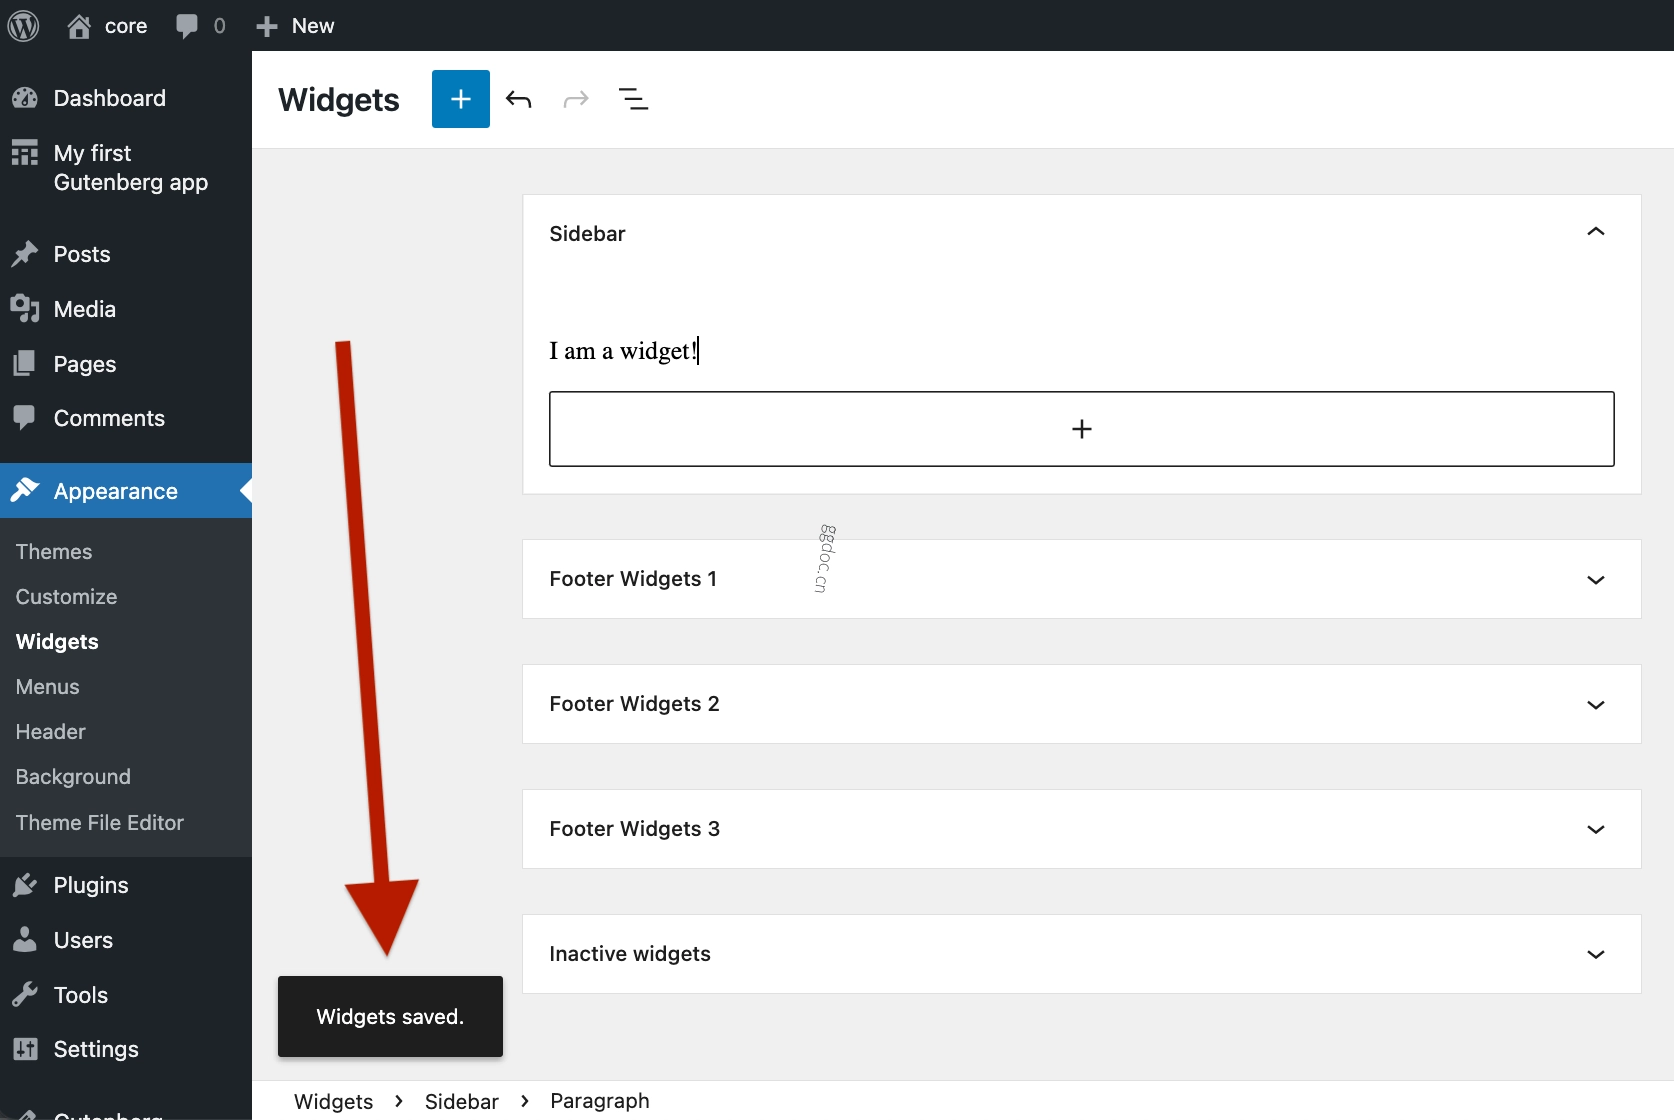
让我们在我们的插件中使用相同类型的通知!这有两部分:
- 显示通知
- 分发通知
显示通知
我们的应用程序只知道如何显示页面,但不知道如何显示通知。让我们告诉它吧!
WordPress 方便地为我们提供了渲染通知所需的所有 React 组件。名为 Snackbar 的组件代表单个通知:

不过我们不会直接使用 Snackbar。我们将使用来自 @wordpress/notices 的 SnackbarNotices,它可以显示多个通知,并使用平滑动画自动隐藏它们几秒钟后。事实上,WordPress 在部件编辑器和其他 wp-admin 页面中也使用了相同的组件!
让我们创建自己的 Notifications 组件:
import { SnackbarNotices } from '@wordpress/notices';

function Notifications() {
    return <SnackbarNotices className="notifications__snackbar" />;
}
基本结构已经就位。SnackbarNotices 会自动从通知存储中读取,所以您只需要在应用程序中渲染一次:
function MyFirstApp() {
    // ...
    return (
        <div>
            {/* ... */}
            <Notifications />
        </div>
    );
}
本教程专注于管理页面,不会详细讨论上述代码片段。如果您对 @wordpress/notices 的详细信息感兴趣,手册页面是一个很好的起点。
现在我们已经准备好告知用户可能发生的任何错误。
分发通知
有了 SnackbarNotices 组件,我们准备分发一些通知!方法如下:
import { useEffect } from 'react';
import { store as noticesStore } from '@wordpress/notices';
function DeletePageButton( { pageId } ) {
    const { createSuccessNotice, createErrorNotice } = useDispatch( noticesStore );
    // useSelect returns a list of selectors if you pass the store handle
    // instead of a callback:
    const { getLastEntityDeleteError } = useSelect( coreDataStore )
    const handleDelete = async () => {
        const success = await deleteEntityRecord( 'postType', 'page', pageId);
        if ( success ) {
            // Tell the user the operation succeeded:
            createSuccessNotice( "The page was deleted!", {
                type: 'snackbar',
            } );
        } else {
            // We use the selector directly to get the fresh error *after* the deleteEntityRecord
            // have failed.
            const lastError = getLastEntityDeleteError( 'postType', 'page', pageId );
            const message = ( lastError?.message || 'There was an error.' ) + ' Please refresh the page and try again.'
            // Tell the user how exactly the operation has failed:
            createErrorNotice( message, {
                type: 'snackbar',
            } );
        }
    }
    // ...
}
太好了!DeletePageButton 现在完全能够处理错误了。让我们看看这个错误消息的实际效果。我们将触发一个无效的删除操作并让它失败。一种方法是乘以 pageId 一个大数:
function DeletePageButton( { pageId, onCancel, onSaveFinished } ) {
    pageId = pageId * 1000;
    // ...
}
一旦你刷新页面并点击任何 Delete 按钮,你应该会看到以下错误消息:
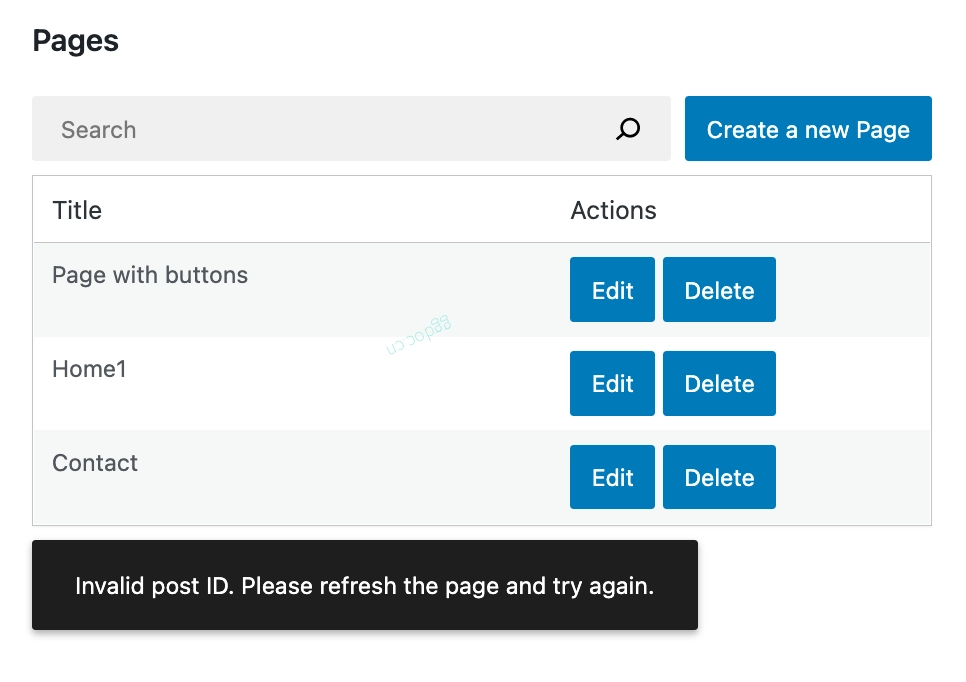
太棒了!我们现在可以删除 pageId = pageId * 1000; 行。
让我们现在尝试实际删除一个页面。这是你在刷新浏览器并点击删除按钮后应该看到的内容:
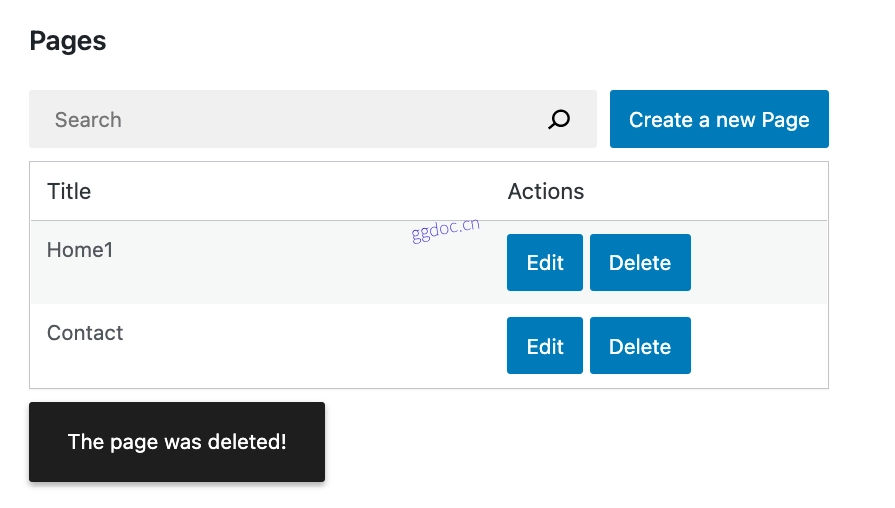
就是这样!
将所有内容串联起来
所有部件都已到位,太好了!这是我们在本章中做出的所有更改:
import { useState, useEffect } from 'react';
import { useSelect, useDispatch } from '@wordpress/data';
import { Button, Modal, TextControl } from '@wordpress/components';
function MyFirstApp() {
const [searchTerm, setSearchTerm] = useState( '' );
const { pages, hasResolved } = useSelect(
( select ) => {
const query = {};
if ( searchTerm ) {
query.search = searchTerm;
}
const selectorArgs = ['postType', 'page', query];
const pages = select( coreDataStore ).getEntityRecords( ...selectorArgs );
return {
pages,
hasResolved: select( coreDataStore ).hasFinishedResolution(
'getEntityRecords',
selectorArgs,
),
};
},
[searchTerm],
);
return (
Title
Actions
{ pages?.map( ( page ) => (
{ page.title.rendered }
) ) }
);
}
function DeletePageButton( { pageId } ) {
const { createSuccessNotice, createErrorNotice } = useDispatch( noticesStore );
// useSelect returns a list of selectors if you pass the store handle
// instead of a callback:
const { getLastEntityDeleteError } = useSelect( coreDataStore )
const handleDelete = async () => {
const success = await deleteEntityRecord( 'postType', 'page', pageId);
if ( success ) {
// Tell the user the operation succeeded:
createSuccessNotice( "The page was deleted!", {
type: 'snackbar',
} );
} else {
// We use the selector directly to get the error at this point in time.
// Imagine we fetched the error like this:
// const { lastError } = useSelect( function() { /* ... */ } );
// Then, lastError would be null inside of handleDelete.
// Why? Because we'd refer to the version of it that was computed
// before the handleDelete was even called.
const lastError = getLastEntityDeleteError( 'postType', 'page', pageId );
const message = ( lastError?.message || 'There was an error.' ) + ' Please refresh the page and try again.'
// Tell the user how exactly the operation have failed:
createErrorNotice( message, {
type: 'snackbar',
} );
}
}
const { deleteEntityRecord } = useDispatch( coreDataStore );
const { isDeleting } = useSelect(
select => ( {
isDeleting: select( coreDataStore ).isDeletingEntityRecord( 'postType', 'page', pageId ),
} ),
[ pageId ]
);
return (
);
}
下一步是什么?
- 上一部分: 构建一个创建页面表单
- (可选) 在 block-development-examples 仓库中查看完成的 app