概述
Format API 使开发人员能够将自定义按钮添加到格式工具栏,并让它们对文本选择应用 格式。粗体是格式工具栏中标准按钮的一个示例。
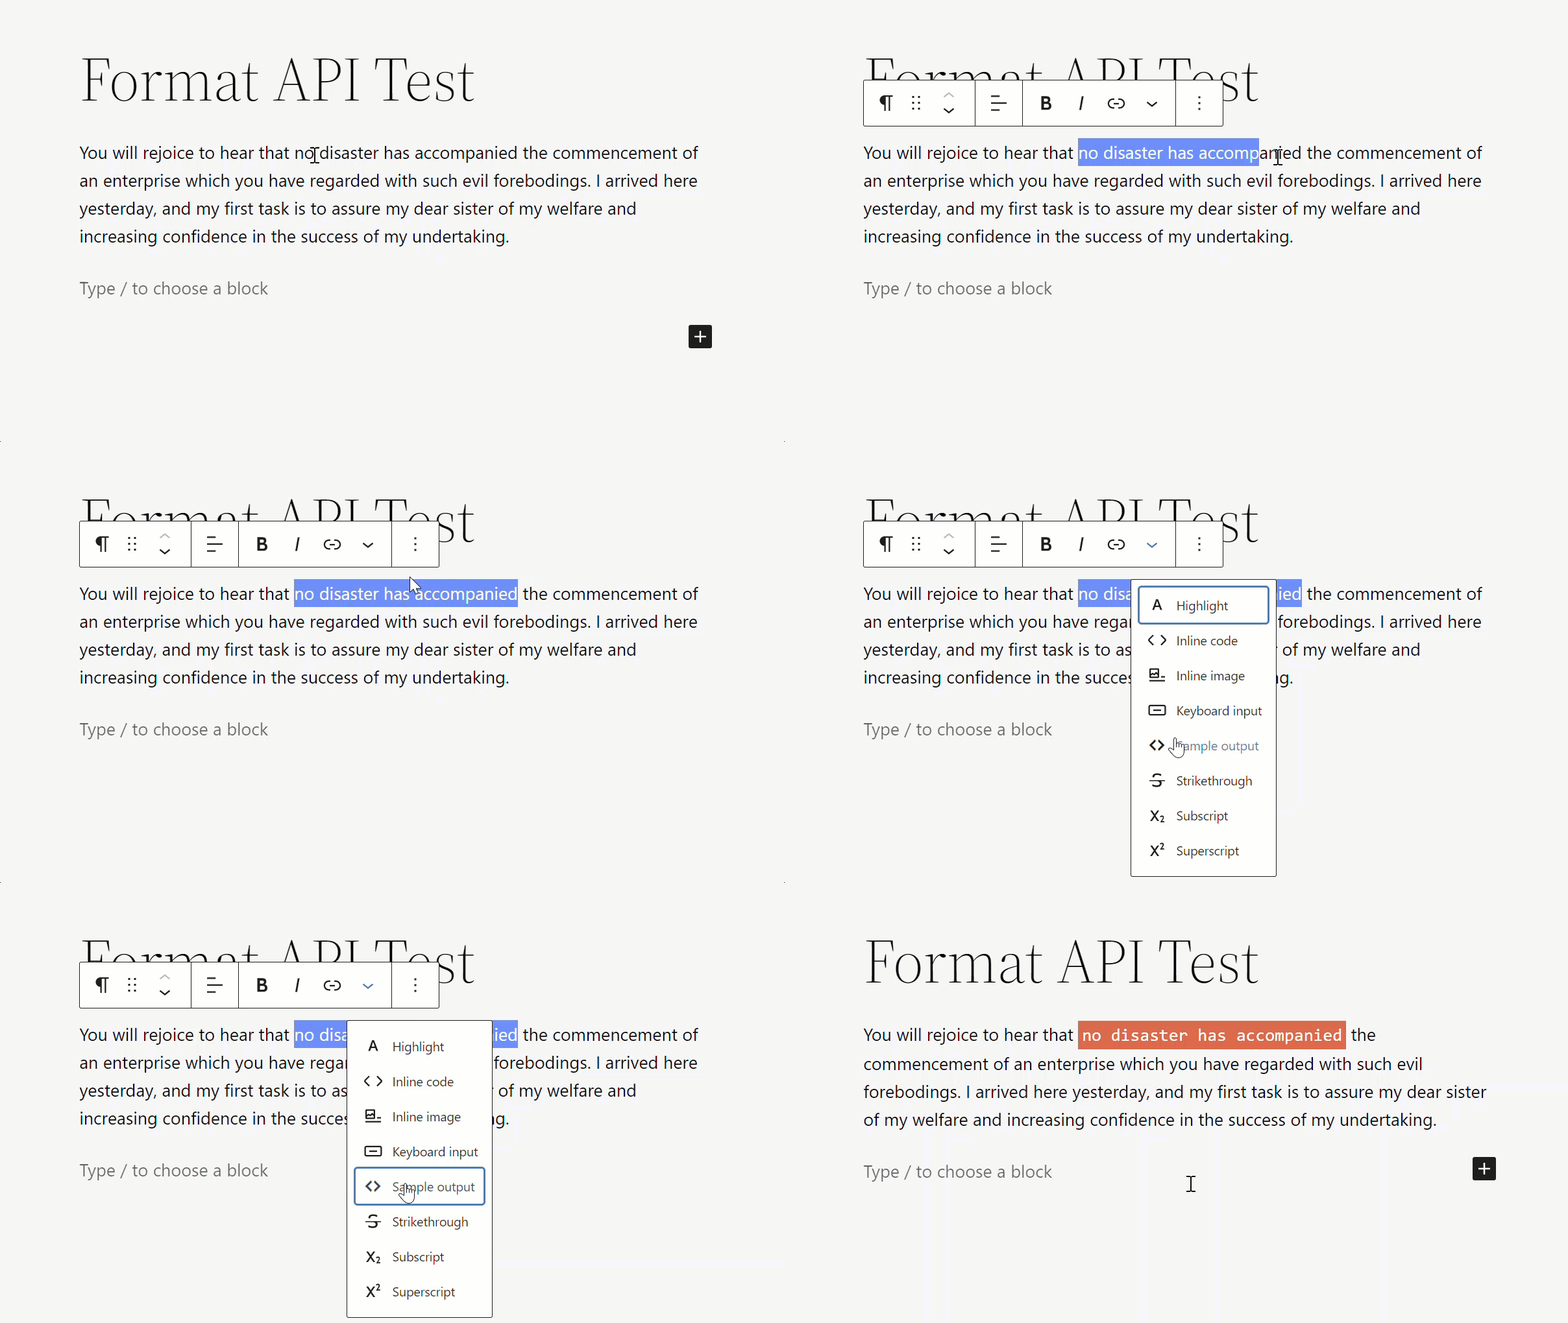
在 WordPress 术语中,格式 是一个 具有文本级语义的 HTML 标签,用于赋予文本选择一些特殊含义。例如,在本教程中,要钩入格式工具栏的按钮会用 <samp> HTML 标签包裹特定的文本选择。
开始之前
本指南假设您已经熟悉 WordPress 插件以及使用它们加载 JavaScript,请参阅 插件手册 或 JavaScript 教程 进行复习。
您需要:
- WordPress 开发环境
- 一个已激活并设置好可供编辑的最小化插件
- 用于构建和加载的 JavaScript 设置
完整的 format-api 示例 可供使用,您可以将其作为设置的参考。
分步指南
本指南将引用 src/index.js 作为进行更改的 JavaScript 文件。在每一步之后,运行 npm run build 会创建 build/index.js,然后将其加载到文章编辑器屏幕上。
步骤 1:注册新格式
第一步是注册新格式,向 src/index.js 添加以下内容:
import { registerFormatType } from '@wordpress/rich-text';

registerFormatType( 'my-custom-format/sample-output', {
    title: 'Sample output',
    tagName: 'samp',
    className: null,
} );
可用格式类型的列表维护在 core/rich-text 存储中。您可以查询该存储以检查您的自定义格式现在是否可用。
在浏览器控制台中运行以下代码以确认:
wp.data.select( 'core/rich-text' ).getFormatTypes();
它将返回一个包含格式类型的数组,其中包括您自己的格式类型。
步骤 2:向工具栏添加按钮
有了可用的格式后,下一步是通过注册组件为 edit 属性添加 UI 中的按钮。
使用 RichTextToolbarButton 组件,更新 src/index.js:
import { registerFormatType } from '@wordpress/rich-text';
import { RichTextToolbarButton } from '@wordpress/block-editor';

const MyCustomButton = ( props ) => {
    return (
        <RichTextToolbarButton
            icon="editor-code"
            title="Sample output"
            onClick={ () => {
                console.log( 'toggle format' );
            } }
        />
    );
};

registerFormatType( 'my-custom-format/sample-output', {
    title: 'Sample output',
    tagName: 'samp',
    className: null,
    edit: MyCustomButton,
} );
让我们检查一切是否按预期工作。构建并重新加载,然后选择任何包含文本的块,例如段落块。确认新按钮已添加到格式工具栏。
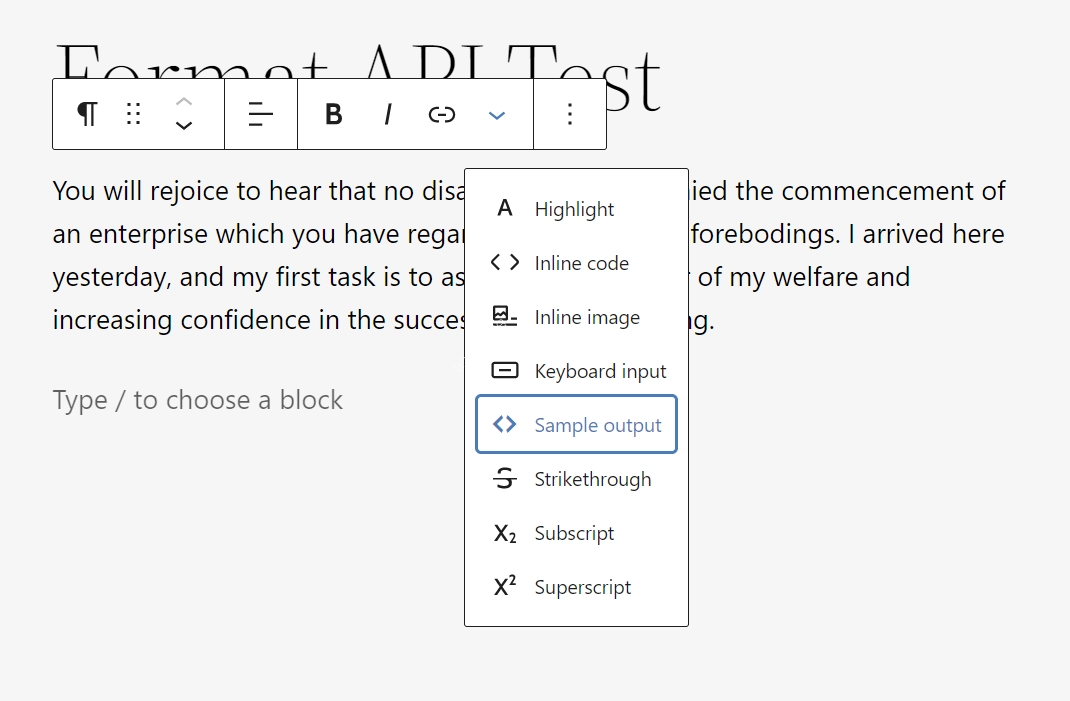
点击按钮并检查控制台中的“toggle format”消息。
如果您看不到按钮或消息,请仔细检查您是否正确构建和加载了 JavaScript;并在控制台中检查是否有任何错误。
步骤 3:点击时应用格式
接下来是更新按钮以在点击时应用格式。
对于我们的示例,<samp> 标签格式是二元的——文本选择要么有该标签,要么没有,因此我们可以使用 RichText 包中的 toggleFormat 方法。
更新 src/index.js 更改 onClick 操作:
import { registerFormatType, toggleFormat } from '@wordpress/rich-text';
import { RichTextToolbarButton } from '@wordpress/block-editor';

const MyCustomButton = ( { isActive, onChange, value } ) => {
    return (
        <RichTextToolbarButton
            icon="editor-code"
            title="Sample output"
            onClick={ () => {
                onChange(
                    toggleFormat( value, {
                        type: 'my-custom-format/sample-output',
                    } )
                );
            } }
            isActive={ isActive }
        />
    );
};

registerFormatType( 'my-custom-format/sample-output', {
    title: 'Sample output',
    tagName: 'samp',
    className: null,
    edit: MyCustomButton,
} );
确认它是否工作:首先构建并重新加载,然后进行文本选择并点击按钮。您的浏览器可能会以与周围文本不同的方式显示该选择。
您也可以通过切换到 HTML 视图(代码编辑器 Ctrl+Shift+Alt+M)来确认,并查看用 <samp> HTML 标签包裹的文本选择。
注册时使用 className 选项以向标签添加您自己的自定义类。您可以使用该类和自定义 CSS 来针对该元素并按您的意愿进行样式设置。
步骤 4:仅针对特定块显示按钮(可选)
默认情况下,按钮会在每个富文本工具栏上渲染(图像说明、按钮、段落等)。您可以使用 数据 API 仅在特定类型的块上渲染按钮。
以下示例仅针对段落块显示按钮:
import { registerFormatType, toggleFormat } from '@wordpress/rich-text';
import { RichTextToolbarButton } from '@wordpress/block-editor';
import { useSelect } from '@wordpress/data';

function ConditionalButton( { isActive, onChange, value } ) {
    const selectedBlock = useSelect( ( select ) => {
        return select( 'core/block-editor' ).getSelectedBlock();
    }, [] );

    if ( selectedBlock && selectedBlock.name !== 'core/paragraph' ) {
        return null;
    }

    return (
        <RichTextToolbarButton
            icon="editor-code"
            title="Sample output"
            onClick={ () => {
                onChange(
                    toggleFormat( value, {
                        type: 'my-custom-format/sample-output',
                    } )
                );
            } }
            isActive={ isActive }
        />
    );
}

registerFormatType( 'my-custom-format/sample-output', {
    title: 'Sample output',
    tagName: 'samp',
    className: null,
    edit: ConditionalButton,
} );
步骤 5:在下拉菜单之外添加按钮(可选)
使用 RichTextToolbarButton 组件,按钮会添加到默认下拉菜单中。您可以使用 BlockControls 组件直接将按钮添加到工具栏。
import { registerFormatType, toggleFormat } from '@wordpress/rich-text';
import { BlockControls } from '@wordpress/block-editor';
import { ToolbarGroup, ToolbarButton } from '@wordpress/components';

const MyCustomButton = ( { isActive, onChange, value } ) => {
    return (
        <BlockControls>
            <ToolbarGroup>
                <ToolbarButton
                    icon="editor-code"
                    title="Sample output"
                    onClick={ () => {
                        onChange(
                            toggleFormat( value, {
                                type: 'my-custom-format/sample-output',
                            } )
                        );
                    } }
                    isActive={ isActive }
                />
            </ToolbarGroup>
        </BlockControls>
    );
};

registerFormatType( 'my-custom-format/sample-output', {
    title: 'Sample output',
    tagName: 'samp',
    className: null,
    edit: MyCustomButton,
} );
故障排除
如果您遇到错误:
- 仔细检查您是否首先运行了
npm run build。 - 确认构建过程中没有语法错误或问题。
- 确认 JavaScript 已加载到编辑器中。
- 检查是否有任何控制台错误消息。
其他资源
本指南中使用的参考文档:
- RichText:
registerFormatType - 组件:
RichTextToolbarButton - RichText:
applyFormat - RichText:
removeFormat - RichText:
toggleFormat
结论
本指南向您展示了如何向工具栏添加一个按钮,并使其对选定的文本应用格式。试一试,看看您可以在下一个插件中用它构建什么。
从 format-api 示例 下载来自 block-development-examples 存储库的内容。
【格式参考】输入:点击 save 按钮。
点击 save 按钮。